Monday, December 3, 2012

New Math Website {subitizing game}

Happy December! I fear that it will be over in the blink of an eye...just like November. 

I love math websites that are more than just games.  You know the ones where your students are learning a huge skill and they don't even know it?! I found a new one and I'm really excited to share it with you.  This game practices subitizing with ten frames and base ten blocks. I promise it's worth your time.  I took some screen shots so you can see a preview here before heading to the website.  I would love to hear about interactive math websites that you love.  

The website if www.fuelthebrain.com
Click on "Interactives"
Click on "Flash"

I circled your choices for flash games.  My favorites are "Multiple Ten Frames" and "Base Ten"


The screen flashes a number and then disappears   Students have to use their subitizing skills to quickly decided the number.  They then enter the answer on the next screen.  The number of seconds the set flashes depends on how well the students are doing.  If they miss a lot, they get more time to see the next set.

My students can read base 10 blocks this year like it's going out of style! Give it a try you'll love it.  There may be some other great games on this site but to be honest I haven't had time to check them out.  Let me know if you find any! 


Sunday, November 25, 2012

December Units & Cyber Monday

It's Sunday evening and I am linking some of my newest units for you below.  I would like to make shopping for Cyber Monday + Tuesday on Teachers Pay Teachers as easy as I possible. 

I have decided that I think we should change Cyber Monday to Cyber Sunday.  It just makes sense.  It sounds better AND don't we all have to go back to work tomorrow???  I had plenty of time today to spend money online at a leisurely pace.  As it stands, I feel like tomorrow when my alarm clock goes off it will be a race! Either way, HAPPY SHOPPING! Remember you can add items to your cart and they will save for when you are ready to checkout.


Friday, November 9, 2012

What are you thankful for?

Shake Your tail-feathers! 
CONGRATULATIONS to
Yvonee, Erica, and Kayce! Ladies, check your email. 

I just finished my Thanksgiving turkey unit in the nick of time.  
Is anyone else wondering where November went?  

I have my lessons ready to go and everything  for next week prepared which means I can enjoy this fabulous 3 day weekend.   If you're planning and preparing still, be sure to head to my Teachers Pay Teachers store and check out my Thanksgiving units.  

Here are a few sample pictures from my newest unit...
This is an accordion book which could be used for so many skills.  I plan to use it to introduce next weeks words.  There's just something about giving students paper to fold and 3 minutes to color that gets their attention!  They'll listen to whatever you want them to put in the little boxes because they'll be loving their mini book. Promise! 

My favorite project that we do during this time of year...
I love discussing the things that we are thankful for.  These are the moments that you see the world through a child's eyes.  It always warms my heart when they say they're thankful for ME! 
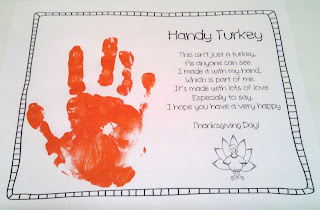
This unit also includes a page similar to this turkey for students to write what they are thankful for.  I take these pages and make them into a class book so we can enjoy reading it together.  The turkeys go home. 

Hand prints for holidays have been around for years and I can still remember doing them when I was in school. I wanted to make sure to capture some memories for mom and dad as we discuss the things we're thankful for this holiday season. 

If you would like this unit for free, leave a comment telling me 3 things you are thankful for...I will choose 3 random winners this weekend. 


What 3 things are you thankful for?


Tuesday, October 30, 2012

Election Lesson Plans & Ideas

Regardless of how you feel about the upcoming election, I feel that as a teacher, it is my duty to teach my students about the election.  I think that it's important to teach students early, that voting is a privilege, and that they can make a difference.  I started my election unit today and on Friday we will hold a mock election.  I won't be at school Monday or Tuesday, due to a teaching conference, so we will take this opportunity to learn about early voting.  In case anyone is still planning, I thought that I would share what we've been doing so far.  

I took the plunge and finally purchased Scholastic News for Grade 1 for my classroom.  After logging on line to watch some of the videos that accompany the issue, I made a great discovery...

I'm not entirely sure why, but for a limited time, you can access the online issues.  I know that with my subscription I will be able to do this, but for right now, it's free for everyone.  I only checked first grade, so I can't say for sure for other grades.  Just follow the links below to check and see.  

I was able to pull up each issue on my classroom Promethean Board and click on interactive parts to learn about vocabulary and play interactive games.   For the election issue, you can view videos for each candidate too.  One option that we really enjoyed was being able to change the audio on the videos and text to Spanish.   I have a high ESL population in my class so I played both versions for my students.  They really enjoyed hearing the videos in Spanish.  

After learning different facts about each candidate, we created a Double Bubble map to show what we learned.  To create the Double Bubble map I used pictures and titles from Gladys Hooray for Election Day Unit.There are more fantastic ideas in this unit than there is time! 

The rest of the week, we will focus on writing about each candidate and then writing about who we think our next president should be.  Friday, we will predict who we think will win, we will hold a mock election,  and we will analyze our data.  For homework, each child was asked to go home and find the candidates on TV.  I told them to tell their families some of the fun facts that we learned.  Tonight I shared all the fun facts with my family over dinner and they seemed super impressed! 

To view the online Scholastic News Issues and videos, click on the link below. 

Sunday, October 28, 2012

MPM School Supplies & 10% off

I was recently contacted by a company MPM School Supplies to go shopping in return for my honest review of their website.  I always get excited about offers like these and then a little nervous because I might have to write something not so flattering about the company or their product.  
Thankfully, this company is great and so was my experience. 

As soon as you go to their website, you have many options to begin searching.  My favorite spot to search from was the pop up menu from the "Teacher Supplies" tab.  When you go to this tab you are given the option to search for supplies by grade level. This is where I began.  I browsed the first grade section while searching for no items in particular....then I found it! Something I had forgotten that I had been searching for. A class set of 100 boards that measure 11 x 11 and have a numbered side and a blank side. 

I was so excited to find these at a reasonable price that this made my shopping experience even better.  I use these for almost every math lesson.  I have been borrowing them from another teacher for most of the year.  I'm sure she was excited that I finally found my own.   

This website was user friendly with easy search screens.  When I wanted to start a search over it was easy to go back to the home page and choose another way to search.  I also felt that they had a pretty wide variety of items to choose from.
In the end I found a couple great items that I've already put to use in my classroom. When I went to checkout, it was even easier than shopping.  Boxes to be filled in, popped up and were easy to read and understand.  To make everything even better, my order was placed on Saturday and arrived on Monday.  I was a little surprised since I ordered two posters and I knew they would be comping in a larger box.

I would and am recommending MPM School Supplies to my readers for their teaching supply needs.  MPM School Supplies is offering 10% of to the first 10 readers who choose to go shopping. 

If you are interested in shopping and want 10% off, click the link below and get started.


Tuesday, October 23, 2012

Monsters Galore (part 2)

Monsters Galore part 2 (teaching capital letters with a highlighter)

There's nothing like reading and learning through a monster to engage a room full of first graders.  I chose to use monsters to introduce capital letters to start a sentence.  

Let me first stop here to mention and thank my co-worker Trish for all of her amazing writing ideas and lessons.  Writing is her passion and when I grow up I want to be her! Many of the ideas for writing you see are inspired by this amazing friend and teacher.  One day I'll be able to convince her to start her own blog...    

In my room this year I have introduced one writing rule at a time.  I taught each skill in isolation and worked on each rule for 1-2 weeks, until as a class, we were ready to move to the next rule.  So far my board looks like this:
Good Writers...
use finger spaces.
write from left to right, top to bottom.
stay on topic. 
use capital letters to start their sentence and for proper nouns. 

To begin our first capital letter lesson, we first created our monster.  From there, I led students to the carpet where I used a Bubble Map to describe possible sentences that could be used to describe our monsters. I modeled heavily how to write about a monster and this is when I introduced where the capital letter should go and why.
Examples of sentences/story: 
My monster has sharp red teeth.  He looks scary.  My monster can dance and scare people.  

We also stopped to discuss how a monster could be a "he" or "she" and that using this pronoun would help make our writing sound better.  

During my modeling, I went back over all the capital letters that were used correctly with a different colored Expo marker.  This 'highlighted' the capital letters to show where a new sentence starts.  As I moved around the room when the students were highlighting, I would use my highlighter to highlight their capital letters on their paper.  This helped them see where they were placed correctly and at times, where they were not.  As an added incentive, for the first lesson, I offered one Skittle for each capital letter used correctly.  
I think they turned out super cute! Here are a few samples. 

My monster is a boy.  He is silly.  He is scary.  He is fuzzy. 
My monster has red teeth.  She is a boy.  She is creepy. 
(Ha! My ESL babies need some work on he/she and boy/girl.)

*This monster pattern is from a Mailbox Magazine and is NOT in my Monster unit. 

For more monster ideas/lessons, check out my Teachers Pay Teachers store. 


Sunday, October 21, 2012

Monsters Galore {post 1}

Monsters Post 1
I enjoy teaching with a theme.  It makes it easier for me and often more engaging for the students.  It leaves an element of surprise as to what's going to come next.  Of course we're going to write our new words on Monday but when I say write your "monster words" it makes it a little more exciting.  The only difference is I might have the words printed on monster clip art or I may have a monster on their writing paper.  As much as I love a theme, I try to avoid the overdone ones as often as possible.  One theme I really enjoy is a monster theme.  Below are the monster books I collected this year for our monster week.  There are so many hilarious monster books to choose from that it's hard to get to them all.  The great thing about monsters is that you could do it in October instead of Halloween or you could use the theme any time of the year!

My new favorite book is Jeremy Draws a Monster and The Monster Returns


In the book, Jeremy draws a monster and it comes to life.  The monster then starts to make demands for other things.  A phone, cake, a hat. Everything Jeremy draws becomes real.  As you can probably guess, the monster comes back in the second book.  Jeremy then has to get a little more creative.  These two books are cute and creative books that had my little ones really thinking outside the box.  We did a writing activity where they drew a picture of something they wanted to become real and then wrote about why they wanted it.  I had silly answers and I had some sad ones too.  One student drew himself.  When I asked him why, he said he drew a taller version because he wanted to be taller.  One littler girl drew a king.  When I asked her why she said so she could wear his crown.  I believe that she drew this because she believes she really is a princess.  I also had dogs, cats, and a handful of pictures of myself.  There's no greater compliment than my students wanting to have an extra me to take home with them.  It was a great lesson and led to some really funny conversations.  If you would like any other monster themed activities check out my Monster Galore unit on Teachers Pay Teachers. 


Saturday, October 20, 2012

Fall in Room 4

There are so many fun things going on in my classroom it's hard to keep up! I have some low babies with an attention span of their age.....6 and 7.  This means we change gears about every 6 minutes.  Whether it be standing up to have a brain break or just moving from our tables to the carpet to learn, we keep it moving.  This post is to show you some of the fun things we've been doing before too much time passes us by. 

My favorite part about getting to know and love a new class is seeing how all these little personalities mesh together.  As odd as it may sound, some classes have strengths that other classes do not.  For example, last year's class had the best sense of humor.  However, they were not very artistic.  No matter what craft activity I gave them, or how much scaffolding I provided for the craft, the outcome was unpredictable.  I had missing arms, upside down heads, and weird creepy faces all of the time!  I even showed my teammates the Valentine people we made to see if I was making it worse than it was.  There was a consensus that my Valentine people were creepy looking and not to be hung on the bulletin board in the hallway.  Another year, I had a class who wanted to sing to learn all day.  We had a song for everything. It was beautiful.  The year after that, I would sing and play music and the kiddos stared at me like I had 3 heads.  What I've learned it comes down to, is finding out what works for each group, and meeting them where they are.    
I'm excited to announce that this year's class loves craft activities and music as much as I do and they're great at both!  Here is some of our artwork. Enjoy!

We used Q-Tips to paint fall trees and then we wrote about them. 

I turned this apple craftivity into a math assessment.  We used a Circle Map to show the number 3 different ways.
No worries about the tally marks being ALL over the place.  I can proudly say that we've re-visited that skill 11,000 more times - and most of us have it. 


We celebrated Christopher Columbus with this adorable activity from A Cupcake for the Teacher.  I'm going to have to admit she's my new favorite when it comes to craftivities.  They are always adorable and easy to prepare.  Teri makes my life soooo much easier. 


We made bats with our hand prints to display skip counting by 10's in our room.  I added Google eyes to make them more fun, because let's be honest, Google eyes make everything more fun!

That's your glimpse into my little corner of the world for today.  I hope you're enjoying your weekend.  If you happen to be busy working on assessments, check out my FREE assessment binder post HERE.  

For those of you waiting, I have posted my Daily Sentence Editing for November! You can click HERE to be taken to my store.  


Thursday, October 11, 2012

What's in an assessment binder? {freebie}

What's in an assessment binder? 

The answer is EVERYTHING.

I'm not afraid to admit that this has been a question that I've asked myself every year since I started teaching. After 2 years of using the same format, I think I'm ready to share.  

If you go on Pinterest and search "reading binder" or "assessment binder" you will see a lot of different formats to create your very own binder.  

Not to knock on the wonderful formats and adorable binders that are available to you to use, but which one to choose? The answer depends on what you need.  As most of us know, every school, every classroom, every district is a little bit different.  I don't believe there is a one size fits all binder for everyone.  I do believe that there are some very important components to every binder that will make using it successful and will also make you want to use it. 
For teachers that know me and have actually seen me teach, the question that I get the most is about my assessment binder. How do I track all of my data? Why so much data? Do you put a check mark or a date in the spreadsheet? I get a lot of questions...

I thought it would be the easiest on me, to blog about my current assessment binder and include the pages I use, as a freebie to my followers. My disclaimer is that my assessment binder works for me and maybe a page or two from my binder will work for you.  You will find the link to this freebie at the end of this post. 

Don't be afraid to add to your binder from a variety of places.  It may not look as uniform, but there is a time and place for cutesy and matchy matchy and then there is a time for data that will drive your instruction

Rule Number 1
You must create, buy, or find a binder cover that makes you happy.  This may seem silly, but you will be dragging this binder everywhere with you for one whole year.  People will look at it and most likely comment  on it.  Love your binder. 
This is my current assessment binder and the quote on the front reads "Have big dreams. You will grow into them."
I love this quote and since joining the blog world and TPT it is something I have to remember. 

Rule Number 2
Buy a binder just for data.  I use a black 1 1/2 inch binder from Wal-Mart.  This is where I keep my assessment scores and data spreadsheets for math and literacy.  Calendars, meeting notes, lesson plans etc. don't belong in this binder. Do not keep your student assessment sheets in this binder.  Keep those in a separate location. It would be impossible to carry each written score sheet / test with you.  
This is your data and you need to be able to put your hands on it at a moments notice

Rule Number 3 
Buy tabs for your binder that double as page dividers. 
I bought these for under $4.00 at Wal-Mart. There are 8 of them and they are a durable plastic.  The tab is attached to a clear plastic divider that breaks up each section.  I have found that if you use page protectors as dividers, they extend too far out and you can't see your tabs. I suggest buying a plastic divider that can withstand flipping between tabs over a period of time.  A paper divider will not work. 

You need to choose titles for your tabs that work for you...with that being said, here are my tab headings.
Literacy Groups
ELA Data
Word Lists
Math Groups
Math Data
Benchmark Data
Interventions

Rule Number 4
Set your binder up to work for you. Make a commitment to use it and carry it with you.  This probably sounds silly.  It's not.  I've seen and made many binders in the past that were cute and filled with spreadsheets that this book or that told me I needed.  In the end, it didn't work for me so I didn't use it and fill it with data.  I had data. Lots of it --scattered in various places and kept in this special wooden drawer I had just for all that loose data.  

******
That's it....that's all the advice I have for you to create a binder.  If you want to see more about my current binder and each tab, look at the pictures below.  At the end of this post, click on the link to your freebie for pages from my assessment binder. 

Literacy Groups Tab
 This is my very simple lesson plan template for my groups.  I plan 2 weeks at a time and it focuses on the skills we need to work on.  When possible, I jot down notes in the upcoming week of skills not mastered that I will need to re-teach during my groups next week. For example, last week we focused on Rhyming Words. - 80% of my class didn't reach mastery on this and I will re-teach  this skill to 2 groups next week using a different approach.  I couldn't have planned ahead for that.  


Under the same tab, I have my notes page for my groups or any time I work with a student. 
After trying about 50 different group note pages from various authors, teacher manuals, and literacy programs this is what I use.  It simple, it's boring, it's plain and it works perfectly for me.  The top headings read "Date", "Student", and "Notes". I put the date, the names of the student(s) I work with and I take notes that make sense to me.  If I need more space, I go into the next box until I've written what I need to write.  Since I don't have pre-made templates, I can write as much or as little as I need.  This document is documentation of when I met with a student and any specific notes I need to make. 

ELA Data
This tab primarily holds literacy data not related to word work.  I dedicate a special tab for that. This picture shows my Running Records spreadsheet.  I complete these a minimum of one every other month.  Depending on the student/class, I may do them more frequently.  This year, I will do them once per month per student because I have a class performing well below grade level. Under this tab, I will keep phonemic awareness scores, assessments from other resource teachers, DIBELS scores etc...anything required by my school that is ELA related. 

Word Lists
This is where my true colors will show.  I am a data nerd.  I love data and knowing exactly where my students' strengths and weaknesses are at all times.  This is what makes me an effective teacher.  
This tab holds my spreadsheets that track oral word wall tests and written word wall tests.  Something that seems obvious, but really isn't always obvious, is that children learn read and write those same words at a rapidly different pace.  I track which words a student can read and I also track their ability to write them using a word wall test or some other written assessment.  I use this information for group work, homework, individual flashcard bags, and one on one assessments/interventions. When I see a pattern of  students missing the same word, it is my responsibility to re-teach that word.  Above you can see I highlighted 'your' and 'said'.  These words have a very low number who can read them.  I will re-teach and re-test on these two words.  I find it more helpful to put the date rather than a check mark.  It does take a tad longer to put the date rather than a check.  Do what works for you. 

Math Groups
My "math groups" tab works the same as my "literacy groups" tab.  I use the same lesson sheet and in place of words, I put math vocabulary.  I keep track of who I worked with and what we worked on. This may be small group or individual.  Example: If I pull Kim aside and work with her on tally marks, I write the date, what we worked on and how she did.

Math Data

This tab stores all of my math data.  I keep a spreadsheet that I created that works for me in this section.  I tested on these skills at the beginning of the year and I will continue to test on them each month until we achieve mastery. I keep all oral and written scores under this section so that I can have them with me at all times.  Example: If a parent comes in to speak with me and is adamant that their child can count to 120 orally, and wants to know why I marked them below on that standard - I can flip to the current month, and explain that I tested them on these dates and this is how high they were able to count.  Additionally you can look at previous months and show growth through the months.  This is data.  Knowing how high a student was able to count in August, September, October and November is data that shows growth and skills that should drive your instruction. The key is testing on the same tests/skills each month so you can look back and show when the learning has taken place. 

Benchmark Data
Under this tab, I keep the spreadsheets and charts for tests that are required by my school.  Examples of this would be DIBELS, AIMS Web, STAR tests.  Many times, these scores come back to me with graphs and charts that can be looked at to narrow down problem areas. Progress Monitoring of this testing is kept under the ELA test. 

Interventions
This tab includes spreadsheets for individual children that I track data on as a specific intervention.  I have many students who have PEP's, IEP's and/or are being referred for further testing.  For these children, it is necessary to have specific interventions in place.  This data needs to be stored separate from whole group data.  In most cases, this type of data is tracked on a graph and the assessment is done more often than other types of assessment.   

As I stated before, every school is different, but it is my hope that I have helped you see possible ways that you can organize your data binder.  I am a mentor at my school to new teachers who I know could benefit from information like this.  I decided to go ahead and post the information for my followers.  If you have any questions I would love to hear them.  Please leave a comment below and I can respond in the comments section under your comment.  

Click HERE to be taken to my free pages from my assessment binder. 


Design by Custom Blog Designs